Linky integration in standard mode with Home Assistant and Tasmota.
In this post, we’ll go through the steps to get energy data from a Linky in standard mode right into Home Assistant through MQTT using Tasmota running on a ESP32 with a Wemos Teleinfo Hat.

1 - Tasmota (Linky side)
On the linky side, the hardware will be :
- Module WiFi Mini NodeMCU ESP32 D1
- WeMos Teleinfo ESP8266/ESP32/S2/C3/S3 Shield
Get Tasmota files :
git clone https://github.com/arendst/Tasmota.git
Go to the Tasmota folder
cd Tasmota
Before compiling, let’s enable the support of Teleinfo
vim tasmota/my_user_config.h
And uncomment the following line
#define USE_TELEINFO // Add support for Teleinfo via serial RX interface (+5k2 code, +168 RAM + SmartMeter LinkedList Values RAM)
Create a venv environment and source it :
python3 -m venv ./venv
source venv/bin/activate
Install plateformio
pip install platformio
Then compile and upload :
platformio run -e tasmota32 --target upload --upload-port /dev/ttyUSB0
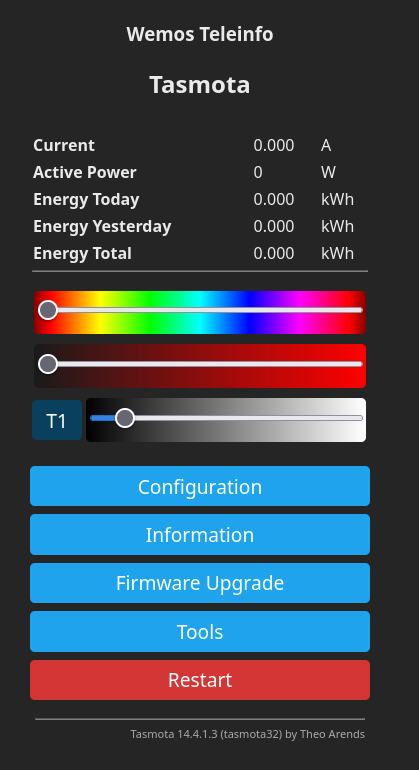
Then finish the Tasmota configuration as usual :
- Connect to the Tasmota Wifi
- Go to the 192.168.4.1 IP address
- Setup your Wifi
Then go to Configuration -> Other and set as template the following parameters (don’t forget to tick “Activate”)
{"NAME":"Wemos Teleinfo","GPIO":[1,1,1,1,1,1,1,1,1,1,1,1,1,1,1376,1,1,640,608,5632,1,1,0,1,0,0,0,1,1,1,1,1,1,1,1,1],"FLAG":0,"BASE":1}

Then the ESP32 will reboot and you should have something like the screenshot below
Finally, let’s configure the Linky mode to standard
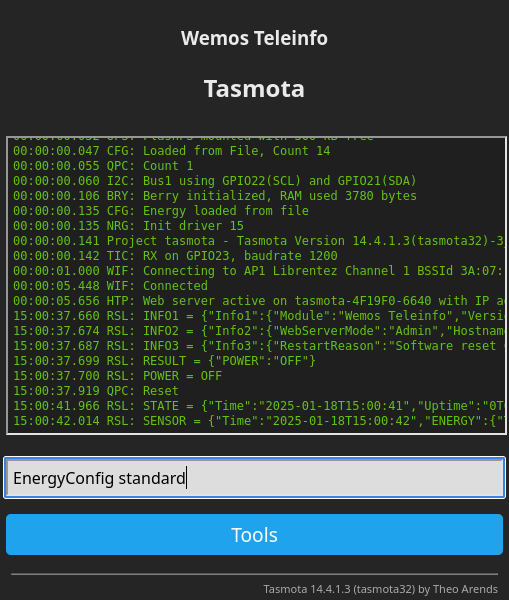
You should have the following feedback
15:02:17.014 CMD: EnergyConfig standard
15:02:17.017 TIC: 'standard' mode
15:02:17.017 TIC: RX on GPIO23, baudrate 9600
15:02:17.019 RSL: RESULT = {"EnergyConfig":"Done"}
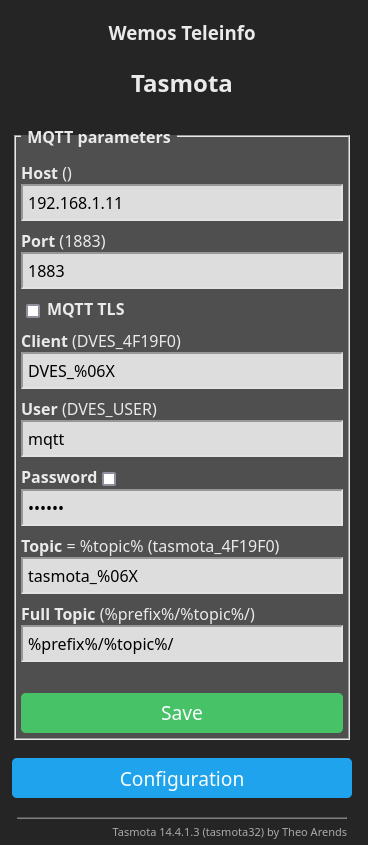
Then I configure the MQTT parameters to push data to the MQTT broker
2 - Home Assistant
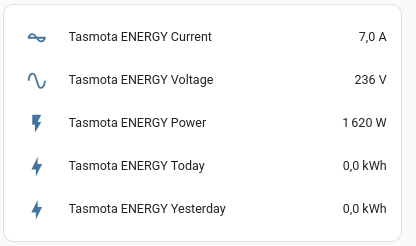
2.1 - Simple sensors
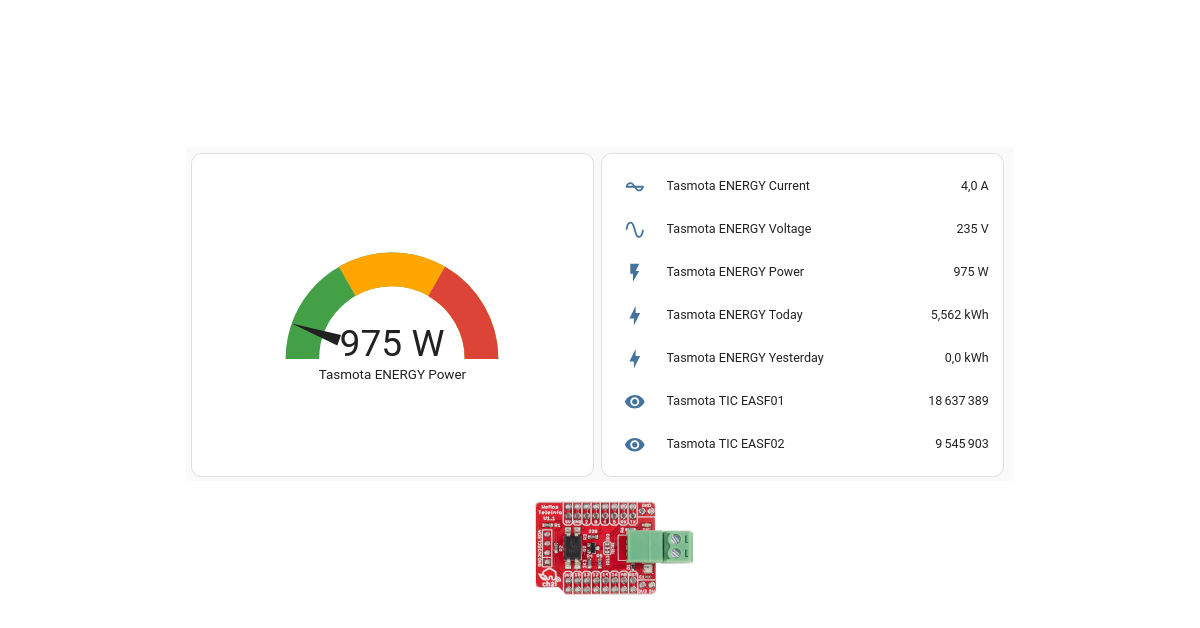
Integration in Home Assistant is easy.
Here is an example :
type: entities
entities:
  - entity: sensor.tasmota_energy_current
  - entity: sensor.tasmota_energy_voltage
  - entity: sensor.tasmota_energy_power
  - entity: sensor.tasmota_energy_today
  - entity: sensor.tasmota_energy_yesterday
With the following result :
2.2 - Energy dashboard
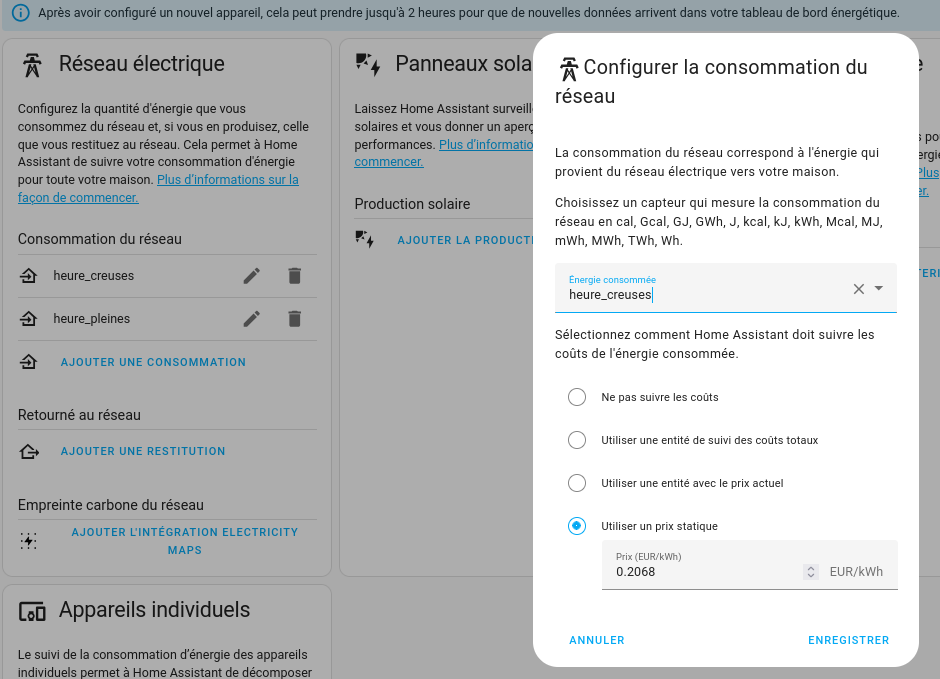
In order to be able to track cost, we’ll create a template doing a copy of indexes and register them with the right properties (device_class, unit..).
In our configuration we’ll have :
template: !include template.yaml
And in template.yaml we’ll have :
sensor:
  - name: "heure_creuses"
    state: "{{ states('sensor.tasmota_tic_easf01') }}"
    unit_of_measurement: kWh
    device_class: energy
    state_class: total_increasing
  - name: "heure_pleines"
    state: "{{ states('sensor.tasmota_tic_easf02') }}"
    unit_of_measurement: kWh
    device_class: energy
    state_class: total_increasing
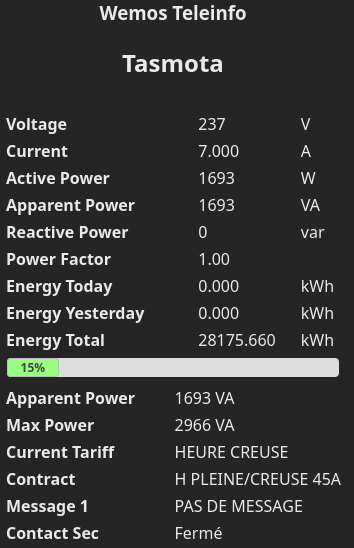
Then you should be able to parameter the energy inputs as follow :
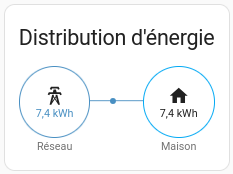
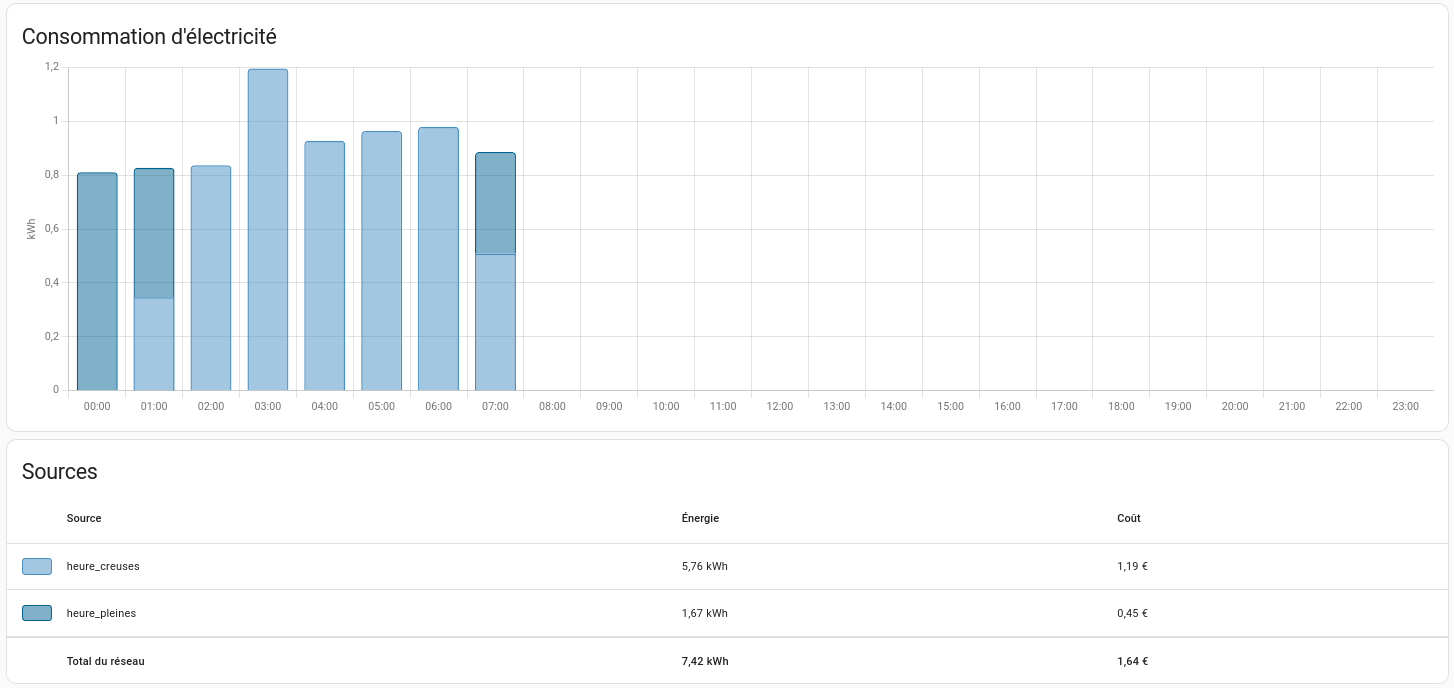
Then you’ll have data displayed.
You’re done : Linky integration in standard mode with Home Assistant and Tasmota.